Select your product to confirm this information applies to you
How to Activate an inReach Subscription on an Alpha 300i
Before you can use the messaging and SOS functions on an Alpha® 300i dog tracking handheld, you must create an account and activate a service plan for the handheld. If you are having issues logging into your inReach® account or creating a new account, refer to
Related
at the bottom of the page.
NOTE: Credit or debit card information needs to be provided to complete the activation steps below.
Activating an inReach Device
If you are activating a brand new device, proceed with the steps below. If you have an inReach device that was acquired second-hand, it may need to be reset before proceeding with these steps. To reset the device, refer to your Owner's Manual.
New Users Without an Account
IMPORTANT: If you have previously used your device with Garmin Express™ or the Garmin Explore™ app, follow the steps under Users Who Initially Paired and Created an Account in the Garmin Explore App.
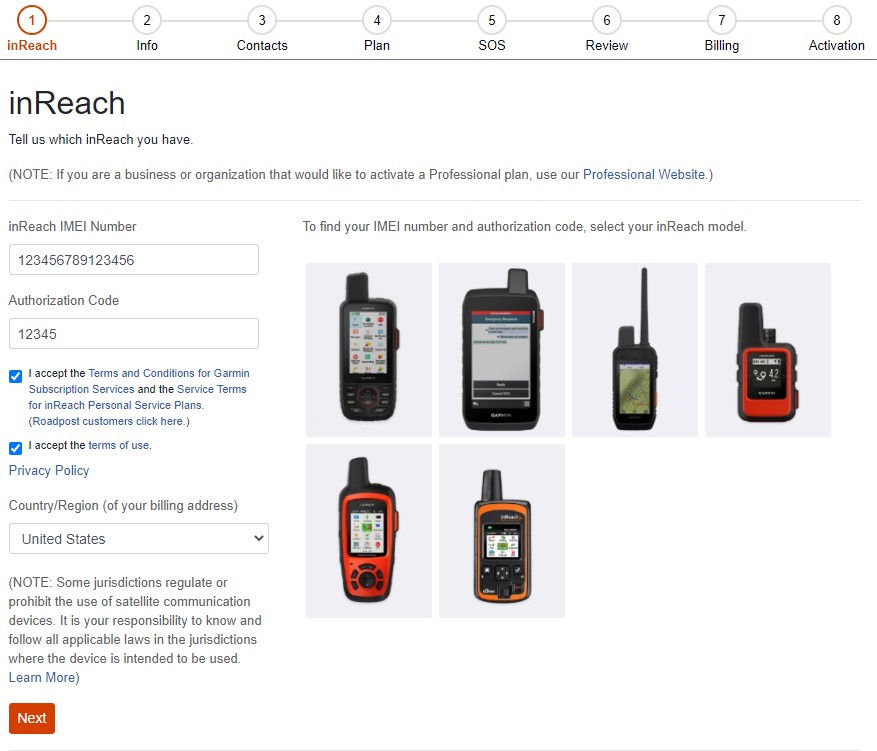
Enter the inReach handheld's IMEI number and Authorization Code, review the Terms and Conditions and Privacy Statement before agreeing, select the country of your billing address, and then click Next.
Enter your name, email, and a password.
Check the box to agree to the Terms of Use, then click Create Account.
Enter your personal information, then click Next.
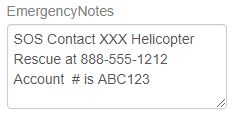
Emergency Notes is a good place to add information of any known medical concerns. If you have additional coverage for medical evacuation or search and rescue, you can include that and how to get in contact with the company providing that service. Example:
Add Emergency Contacts information, then click Next.
Select a specific plan under the Annual Plan or Freedom Plan options.
If desired, choose the additional Search & Rescue Insurance. This is not required. Once finished, click Next.
Review all entered information to confirm it is correct, then click Next.
Check the box to agree to the Terms of inReach Service, then click Next.
Enter your billing information, then click Next.
Follow the prompts to finish activating your inReach device and account, then take the device outside.
It is important to take your inReach handheld outside with a clear view of the sky to complete the activation process. Also sync your inReach handheld with your account after activation.
Existing inReach Users
NOTE: Personal plan accounts can only assign one active inReach device for use at a time. When adding a device to an existing inReach account, you will be prompted to move your service plan from the previous device. If you are operating as a business or organization and need to add additional users to your account, a Professional subscription is required. For more information, see - Difference Between inReach Personal and Professional Plans.
Using the drop-down, select the current active inReach device.
Enter the new or replacement device IMEI number and authorization code.
TIP: If you need help finding the IMEI number and authorization code, select one of the device images in the Switch Service window and instructions will be provided.
Select Switch.
Service will begin transferring to the new device. This may take several minutes.
While transfers typically take 10-15 minutes, it can take upwards of an hour. The amount of time depends on how many other users are activating or upgrading service.
If Switch is not seen, try hovering the mouse over the Switch Service prompt and scroll down (Switch will be located at the very bottom of the prompt). If Switch is still not seen, try increasing the screen resolution to at least 1280x1024. For steps, select your operating system:
After you see a confirmation that activation is complete, you may begin to make changes to your Garmin Explore account, if needed.
Emergency Notes is a good place to add information of any known medical concerns. This is done under Account at the top of the page. If you have additional coverage for medical evacuation or search and rescue, you can include that and how to get in contact with the company providing that service. Example:
If you have multiple users on your account and need to assign an additional device to another user or yourself, see - null.
It is important to take your inReach handheld outside with a clear view of the sky to complete the activation process. Also sync your inReach handheld with your account after activation.
Users Who Initially Paired and Created an Account in the Garmin Explore App
Select a specific plan under the Annual Plan or Freedom Plan options.
If desired, choose the additional Search & Rescue Insurance. This is not required. Once finished, click Next.
Review all entered information to confirm it is correct, then click Next.
Check the box to agree to the Terms of inReach Service, then click Next.
Enter your billing information, then click Next.
After you see a confirmation that activation is complete, you may begin to make changes to your Garmin Explore account.
Emergency Notes is a good place to add information of any known medical concerns. This is done under Account at the top of the page. If you have additional coverage for medical evacuation or search and rescue, you can include that and how to get in contact with the company providing that service. Example:
If you have multiple users on your account and need to assign an additional device to another user or yourself, see - null.
It is important to take your inReach handheld outside with a clear view of the sky to complete the activation process. Also sync your inReach handheld with your account after activation.
Watch Our Video
IMPORTANT
After activating, you need to sync your handheld. Steps on syncing can be found in the article: null
You can no longer add additional users to Personal Plan inReach accounts. You need a Professional Flex Plan to have multiple users with assigned devices on a single account.
The process for creating an inReach account is best done on a computer. Using a mobile device may result in issues with account creation.
If you would like to transfer service from your current inReach device to a new inReach device, you will need to follow the steps in null.
Registering Your Handheld
Your handheld is registered automatically during activation of service to the device, or adding it to your Garmin Explore account.
The Alpha 300i handheld receives software update through the Garmin Express program or via Wi-Fi. Adding the handheld to the Garmin Express program to update it will also register the handheld. For more information, refer to Related below.